Tuesday, May 12, 2009
YouTube को भिडियो डाउनलोड गर्ने एउटा सजिलो उपाय
Saturday, April 18, 2009
Internet Explorer Tips and Tricks
Quick jump to Web Site Part II IE : Type go ebay in the URL address field.This will go to MSN search page site and select the best match.
Presentation Mode IE : Select the F11 function key to enter Presentation mode.Select the F11 function key to toggle back.
Resize Text Size IE : Hold down ctrl key and move the wheel on the mouse.The page text will enlarge or shrink.
Page forward and back IE : Hold down shift key and move the wheel on the mouse.This will page forward or backward through the pages selected.
Quick jump to the addresses IE : Select the alt and D keys together.This will select the URL address field.
Page scroll using mouse wheel button IE : Push down on the mouse wheel button and slide the whole mouse up and down. This will page up and down the screen.
Select visited web site addresses IE : Select the F4 function key.This will show a listing of sites you have visited for selection.
Refresh the page IE and Netscape 6 : Select the F5 function key.This will refresh the current page.
Quick Search IE : In the address field type find or ? then your topic or keywordThis will go to MSN search engine and search on your topic.
Quick Search part II IE : Select the F3 function key.This will display the left side search column box.
Open a New IE Window : Enter Control NA new IE browser window will appear.
Open a New IE Window with One Click : Hold down shift and click on the link.A new IE browser window will appear.
Page forward and back using arrow keys IE : Hold Alt button and use the arrow keys to page foward and back.
Stop flashing images IE : Find a site that has flashing images About.comAfter the page loads select the Esc button.
Get to Your Favorites with Keyboard Shortcut IE : Enter Control-I will bring up your left pane favorites. Enter Control-I will make it disappearEnter Control-B to organize your favorites
Print Part of a Web Page IE : Select the area you want to print with your mouse.Select the print option from the menu bar - not the print icon. Change the print range area to selection.
Here is the list of shourtcut keys for Internet explorer.
CTRL+A: Select all
CTRL+C: Copy
CTRL+X: Cut
CTRL+V: Paste
CTRL+F: Find
CTRL+E: Search
CTRL+W: Close window
CTRL+N: New browser window
CTRL+R: Refresh web page
CTRL+O: new location - esc to close
CTRL+D: quickly save a Web page to your Favorites list
CTRL+I: Favorites
CTRL+P: Print the page
CTRL+H: History
CTRL+tab: goto URL Address field
Alt+Spacebar+X: Window Maximize
Alt+Spacebar+R: Window Restore
Alt+Spacebar+N: Window Minimize
Home key: beginning of page
End key: bottom of page
Backspace key: move back a page.
CTRL+LEFT+ARROW : quickly move the cursor back between parts of the address.
Previous pages quickly, click the small down arrow to the right of the Back button.
Speed up 20% Internet Broadband Connection
1.make sure your logged on as actually "Administrator". do not log on with any account that just has administrator privileges.
2. start - run - type gpedit.msc
3. expand the "local computer policy" branch
4. expand the "administrative templates" branch
5. expand the "network branch"
6. Highlight the "QoS Packet Scheduler" in left window
7. in right window double click the "limit reservable bandwidth" setting
8. on setting tab check the "enabled" item
9. where it says "Bandwidth limit %" change it to read 0reboot if you want to but not necessary on some systems your all done. Effect is immediate on some systems. some need re-boot. I have one machine that needs to reboot first, the others didn't. Don't know why this is.
This is more of a "counter what XP does" thing. In other words, XP seems to want to reserve 20% of the bandwidth for its self. Even with QoS disabled, even when this item is disabled. So why not use it to your advantage. To demonstrate the problem with this on stand alone machines start up a big download from a server with an FTP client. Try to find a server that doesn't max out your bandwidth. In this case you want a slow to medium speed server to demonstrate this. Let it run for a couple of minutes to get stable. The start up another download from the same server with another instance of your FTP client. You will notice that the available bandwidth is now being fought over and one of the clients download will be very slow or both will slow down when they should both be using the available bandwidth. Using this "tweak" both clients will have a fair share of the bandwidth and will not fight over the bandwidth.
yahoo messenger मा को Invisible mode मा बसेको छ पत्ता लगाउने कि ??
सबै भन्दा पहिले तपाईंले जो साथी सँग कुरा गर्न चाहनु भएको छ त्यो साथीको ID मा double क्लिक गर्नुस् यसो गर्दा त्यो साथी सँगको conversation window खुल्छ । अब तपाईंले IMvironments मा क्लिक गर्नुस् र doodle लाई चुज गर्नुस् । अब तपाईंले यो लेखेको देख् नु हुनेछ "Waiting for your buddy to load doodle" । एक छिन कुर्नुस् र यदि window मा यो load भयो भने Sure तपाईंको साथी online मै छ तर उ Invisible mode मा छ र शायद तपाइ सँग कुरा गर्न चाहनु भएको छैन ?? र यदि load भएन भने तपाईंको साथी साचिकै online मा छैन भन्नेमा पक्का हुनुस् । लौ अब हेर्ने हैन त को कसले तपाईं लाई झुक्काउदै छ offline मा बसेर ???
Use your HOTMAIL on OUTLOOK EXPRESS
Follow the following
step
1.click tool > Account > Choose Mail > Add > Mail >
2 your name > your email > Next
3. My incoming mail is HTTP My HTTP mail service provider is HOTMAIL > Next
4.Account name is your email id & your password is you know your self. Note: - Don't click on log using secure bla bla bla....
5.if you using public computer don't click on remember password
6.Next and finish > close
7.Enjoy!
Download youtube video
1) Choose your youtube video


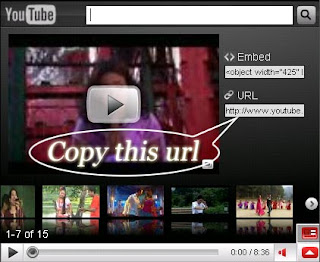


7) Click on save
Add Yahoo! Messenger to Blog
and not only that, we can choose icon what is will add. The choice is differentiated in 10 choice, you remain to choose style ID which which is compatible according to your :
This is the style ID of yahoo! messenger icon :
![]() Allright, to placed the yahoo! messenger icon just place this code at your sidebar :
Allright, to placed the yahoo! messenger icon just place this code at your sidebar :
 For example. If your yahoo ID is balakasadut24@yahoo.com, your ID is balakasadut24, So the code for yahoo! messenger icon with choice Style ID 9 is as follows :
Now, how to place the code to your blog. Follow the steps :
1. Login to blogger with your ID.
2. After entering the dasboard page , click Layout. Please saw the picture :
 3. Click at Page Element tab. See the picture below :
 4. Click at Add a Gadget.
 5. After emerging pop up window , click add to blog button for the things HTML/JavaScript. See the picture following :
6. Copy and paste the code below into available colum :
(To copy the code: Right click under the box and click select all and copy)
7. Change YOURID with your yahoo ID and StyleID with number of your choice.
8. Click on save
9. Finish. Please see the result.
रमाइलो वेब साईट


